

I needed some shabby chic furniture to use for display for some of the items I make for my etsy shop.

I had this country bench from my younger days, but, I was just never really thrilled with the color of the stain.
So, I thought I would update it with a new look and give it some great, shabby chic styling. :)

First, I sanded it down with a rough grit sandpaper to remove the sheen of the stain and to give it some tooth to allow the paint to adhere well.

Then, I gave it a good dusting with this paint brush.
I use this a lot when my minis get dusty from being left out too long, it does a wonderful job of removing any dust. Did you know, that is how museums keep a lot of their artifacts clean? With a paint brush, yes!

I picked out a green paint to use as my base color.
I love these little jars of acrylic paint that you can pick up at the craft store inexpensively.
The one I chose was Folk Art "Yellow Citron" by Plaid.

Well, I decided it was just too yellowy for my liking, so I grabbed another green, America's Mint Julep Green from DecoArt.

I mixed with my favorite and most universal tool, the bamboo skewer. I use these skewers for everything, they are just so handy for so many different applications.
These dispose-able food containers are great for mixing paints in. Just make sure you mix enough paint at one time so there is enough for your entire project. The lid can be placed on the container while you wait for a coat to dry, saving your paint from drying up.
I wasn't trying to be matchy matchy with the items for my etsy shop, as I would be keeping the bench, but, as so many of you know what I mean, I had a color in my mind's eye and that was what I wanted.
I call it Vintage Green. ;)

Finally, I was happy with the shade of green.

Two good coats were just what this piece needed.

Next to begin the shabby chic process.
I diluted Folk Art "Wicker White" paint from Plaid with water to make a white wash.
I didn't want a solid coverage for the top coat of paint.

Another coat of the white wash or two.

It looks more like a solid coat than it actually is, there is some of the green visible on the bench, it just didn't photograph as well, as I thought it did. ;)
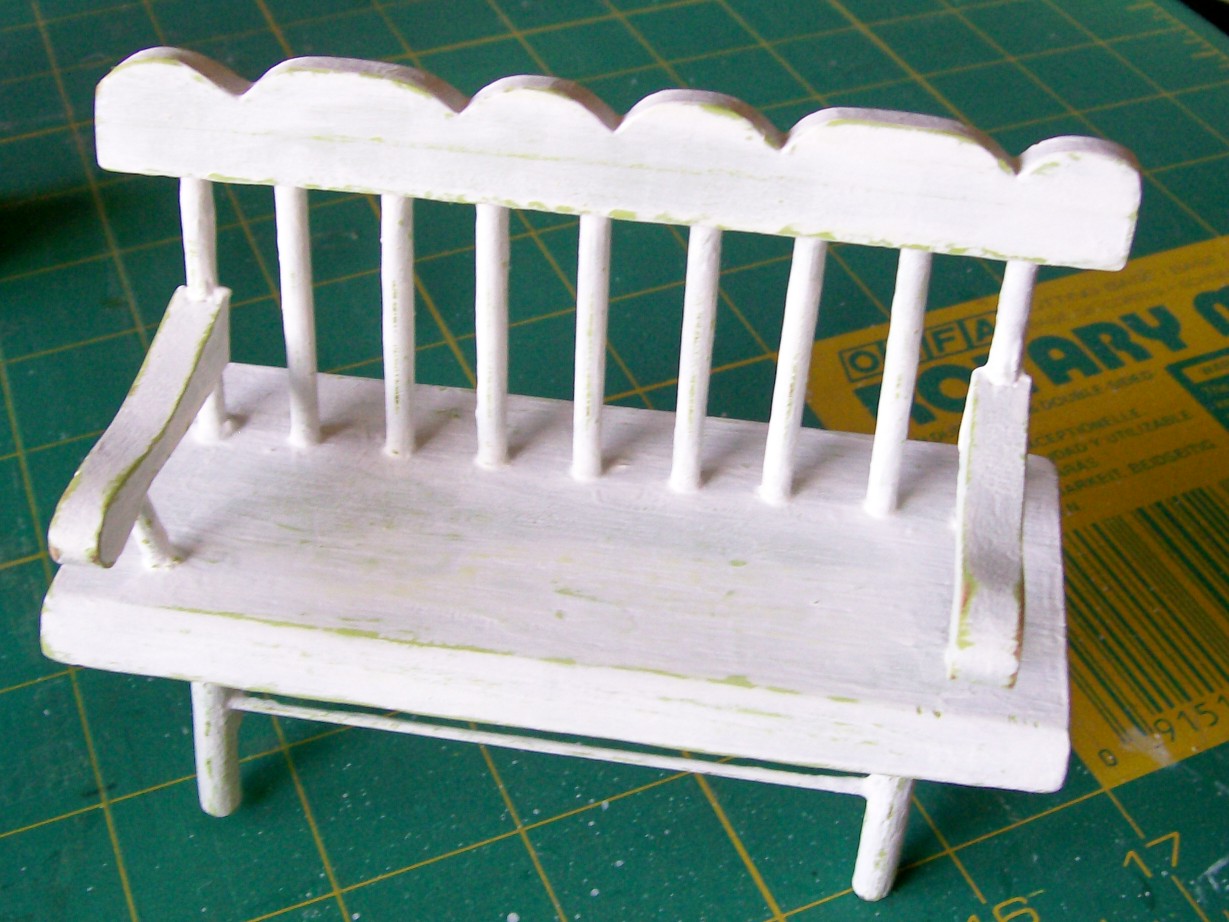
Lastly, an all over sanding with a fine grit sandpaper to show some age, wear and tear.
I didn't add any type of clear coat to this, as I preferred the rustic, matte finish.
I think it has a lot more charm and character than it did before, wouldn't you agree?
Now, it's perfect for using in displays for my minis for sale and eventually, it will end up in my dollhouse in the shabby chic bedroom.
So, don't be afraid to experiment and have fun with your minis. It doesn't have to be all rule oriented, do what you want!
You don't even have to be an expert painter to make use of the shabby chic styling.
Would you like to see some other tutorials I have made?
Click here, to find a tutorial on how to faux finish some resin planters to make them look aged.
Click here, to find a tutorial on how to make replacement cushions for a popular rocker glider.
Enjoy! :)
.


